Meat grinders are one of the most useful kitchen appliances for meat lovers and people who love cooking from scratch.
Meat grinders, as their name imply, are used to obtain ground meat that can be used for hamburgers, chili, meatballs and other recipes.
There are many types of meat grinders but they can generally be piled in three categories:
Manual which use a hand crack in order to grind the meat.
Attachment which work with the help of other kitchen appliances, such as blenders.
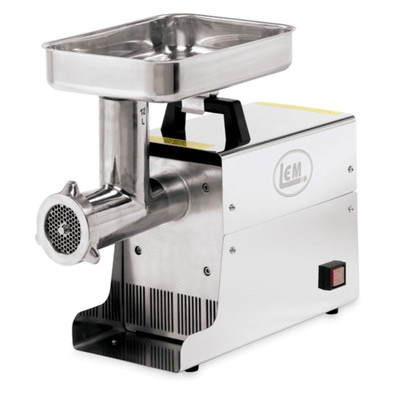
Electric which work with electricity and require very little effort to use.
Because of their small size and affordability, manual meat grinders are usually the kind of grinder most people get for their kitchen, particularly if they’re only using it a couple of times a week.
Unlike other meat grinders, the manual model requires to be manually assembled when pulled out of the box which is something most people don’t expect and don’t really know how to deal with.
If that’s your case, don’t worry. Assembling manual meat grinders is a relatively straightforward process; you just need to make sure to follow each of the following steps:
Step 1: Inspection
The first thing you need to do is to inspect all the parts of your grinder.
While the parts change from brand to brand, you’ll usually find the body, a handle, the feeder, metal plates, the blades and a plastic head lock.
Regardless of the brand, you need to check for the same things:
- Make sure the parts are clean, free of oil or any residues
- Make sure the parts are rust free and dry
- Make sure the blades are sharp
It’s not uncommon for manufacturers to ship parts that are still coated in some kind of lubrication fluid. If this happens to you just wash each part and carefully hand dry them before assembling the rest of the grinder.
Step 2: Insert the Handle into the Body
While all parts of the meat grinder are important, these two are some of the most easily identifiable.
Place the body of your grinder on a solid surface (put a piece of cloth underneath to prevent slipping if necessary) and firmly insert the handle into its slot.
Make sure you can crank the handle without any trouble and that the handle doesn’t slip out of the body as you use it. If you notice that the handle rubs too much on the sides of the body or the cranking movement is too difficult remove the handle and try to insert it again.
Once the handle is moving properly you can move to the next step.
Step 3: Locate the Auger
You’ll notice there’s a screw-like part coming out of the main body of your machine.
Depending on your model, this screw-like part, called the auger, might be comping out of the handle or might even be a separate piece.
If it’s the last, just insert the auger into the body and secure firmly.
Once you’ve located the auger (and assembled it if necessary) you can move to the next step.
Step 4: Assemble the Blades
The auger holds in place the blades and the extrusion plate.
The blades slide into the auger first and are then followed by the extrusion plate.
The extrusion plate, also known as a grinding plate, is what determines the thickness and coarseness of your ground meat.
Meat is ground by the blades and then pushed through the grates on the grinding plate, thus resulting in the shape you’re familiar with.
Because of this, you need to make sure you’re using the right size plate from the very beginning.
New meat grinder models have a shorter auger that hold the blade and plates in place thanks to its shape.
Older models have a longer auger and need hex or wing nuts to hold in place the cutting blades and extrusion plates though the older the model the less likely it is to have a grinding plate to begin with.
If you suspect your meat grinder is missing any parts check the instruction manual and count them. Contact the manufacturer or the place that sold it to you if there are any pieces missing.
Step 5: Mounting the Grinder
This step is determined entirely by the kind of meat grinder you’re using.
Most manual meat grinders need to be attached to a surface. They come with wedges that cling to the underside of your table or counter, holding in place the grinder.
Modern manual meat grinders, however, might come with a suction cup instead of wedges or little ‘legs’ that support the body while you hold it in place so you might not be able to mount it at all.
Regardless of the model, the outcome is the same. You need to make sure the grinder is safely attached to your counter. Be it by bolting it in place, holding it with your free hand or using suction cups.
If it’s the later, remember to use clear counters or solid plastic tables as wood or other porous materials aren’t good for this kind of thing and might cause accidents.
If you’re planning on clamping or even bolting your grinder in place just make sure the table or counter you’re using is solid and at least 1 ½ inches thick, as a fragile table might snap once you start working.
Step 6: Test the Grinder
Now that you’ve assembled your meat grinder and you’ve secured it to the counter it’s easily to get carried away and believe you can start grinding right away but that’s unwise.
Before you start grinding make sure to test your grinder.
Crank the handle a couple of times to make sure the body doesn’t move at all and that the handle moves without any resistance. Adjust the pieces accordingly if needed.
Step 7: Start Grinding
You’re now ready to grind!
Remember to feed meet to the grinder slowly and to keep your hands away from the blades at all times.
Most modern meat grinders come with a food pusher that’s used to push the meat deeper into the machine while keeping your hands free of risk. Use it.
Good news! You’ve now assembled and used your manual meat grinder for the first time.
Bad news. It’s time to disassemble and clean it.
While it might be tempting to leave the cleaning for later, if you want to keep your meat grinder in top shape it’s important to wash right away meat grinders have plenty of nooks and crannies that can harvest bacteria if left unchecked.
Think of it this way: Grinding meat releases a lot of juice which can get in just about every part of your grinder. This juice will dry and attract all kinds of things and might even damage your grinder so it’s important to wash your grinder after each use.
In order to clean your manual meat grinder, you just need to follow the next steps:
Step 1: Grind Bread
This is an optional step but it makes washing easier so you should consider doing it.
Grind one or two bead slices as if you were grinding meat. This will remove meat residues from the main body and the grinding parts.
Step 2: Dismount the Grinder
The first step is to remove the grinder from your counter so unclamp it or break the seal created by the suction cup.
If your meat grinder stays in place thanks to its weight and nothing else then you’re in luck, as you can skip this step.
Step 3: Disassemble
This is done in reverse as the previous steps.
Start with the blades and extrusion plates, then remove the auger, then the crank.
In recent models removing the auger and the blades is easier but it still carries its risks, particularly because the blades will be slippery so use a paper towel or a cloth to dry them up a little before attempting to remove them.
Do this step very carefully as it’s one of the most dangerous steps on this list.
Step 4: Wash the Grinder Parts
Most meat grinder models aren’t dish washer friendly so you’re going to have to hand wash it.
Use warm soapy water and wash each part individually, being particularly careful when it comes to washing the blades.
The extrusion plate also requires extra care, not only because you can injure yourself if you’re not careful but also because this is the hardest part to wash, as there can be meat residues left in the little holes.
To ensure a better cleaning of your extrusion plate use a brush. Even a toothbrush will help, provided the bristle isn’t too hard.
As for the body and other, hard to reach parts? You can dip them in hot, soapy water and scrub them inside and out.
If you want, get a bottle brush and use it to wash the inside of the body.
Step 5: Dry the Grinder Parts
This is so important it deserves to be its own step.
While tempting, you can’t just set your grinder parts to the side and wait for them to air dry, as this is just asking for trouble.
Dry each and every part with a soft cloth (both inside and out) and then set them aside to air dry. This will minimize the risks of rust and will help your meat grinder ‘live’ longer.
Step 6: Store your Grinder
Mineral oil is an excellent way of preventing rust so once you’ve cleaned and dried your parts spray them with food-grade mineral oil.
You don’t have to use too much, just enough to properly cover the parts.
Once you’ve done this, place the small parts in plastic bags along with a bit of rice (the rice will absorb humidity, thus minimizing even further the risk of rust)
You can then store your grinder in a dry and cool place or, if you prefer it, in the freezer.
While the later might seem counterproductive remember that meat grinders need to be cold in order to keep the meat you’re grinding ‘solid’ and this is an excellent way of doing it.
Step 7: Store your Blades
While meat grinder blades are resistant and often sharp enough that they rarely require to be sharpened, taking extra care of them is an excellent way of keeping them in top shape.
Wrap your blades in soft, clean cloth or even in small cardboard boxes (like the ones used for lightbulbs to keep the blades from banging around and rubbing against hard surfaces, such as cabinet or freezer walls.
Extra Tips:
- Remember to always wash your meat grinder parts before assembling the meat grinder. Yes, even after you’ve used them plenty of times.
- Remember the good-grade oil used to prevent rust? It won’t hurt you but it should be removed before using your grinder.
- To make washing off the oil easier you can create your own bleach solution. All you need to do is add a TBSP of bleach to a gallon of water and use that to wash the grinder parts.
- If you aren’t comfortable storing your meat grinder in the fridge or you simply don’t have enough space to do it that’s okay, it won’t affect the grinding process. Just remember to always use cold meat when grinding.
And there you have it! Now you know not only how to assemble a manual meat grinder but also how to disassemble it, clean it and store it properly in order to get the most out of it!
Do you have any questions, doubts or something to say? Let us know in the comments!
Thank you for reading, we hope you found this article useful and informative.
If so, don’t forget to share!